Homemade Eclairs Made Easy: Your Guide to Perfect Choux & Diverse Fillings
Eclairs, with their elegant oblong shape, crisp pastry shell, and luscious creamy filling, often intimidate even seasoned home bakers. They carry a reputation for being a complex patisserie delight, reserved for professional bakeries. However, we're here to demystify the process and show you that crafting perfect homemade eclairs is not only achievable but incredibly rewarding. Forget the fear, because with our detailed guide, you'll soon be mastering
simple eclairs three ways, turning out batches that rival any artisan shop.
At its heart, an eclair is a symphony of three key components: the light-as-air choux pastry, a decadent filling, and a glossy, smooth glaze. Each element plays a crucial role in creating that unforgettable taste and texture experience. While the classic chocolate eclair remains a timeless favorite, the beauty of baking at home lies in the freedom to experiment. We'll explore not just the fundamentals of achieving that coveted crisp choux, but also how to diversify your creations with various fillings, making your eclair journey truly your own.
The Foundation: Mastering Choux Pastry for Flawless Eclairs
The secret to a truly outstanding eclair lies in its choux pastry. This isn't just any dough; it's a magical mixture that puffs up dramatically in the oven, creating a hollow, airy shell that's perfect for holding generous amounts of cream. Often called *pâte à choux* in French, its preparation might seem finicky, but following a few key steps will guarantee success.
To make the perfect choux pastry, you'll need:
- Flour (all-purpose works best)
- Unsalted butter
- Water and milk (a combination yields a richer, softer crust)
- A pinch of salt (enhances flavor)
- A touch of cane sugar (for subtle sweetness and better browning)
- Vanilla extract (optional, for fragrance)
- Eggs (the binding and leavening agent)
The process begins by bringing the butter, water, milk, sugar, and salt to a rolling boil. Once melted and bubbling, the flour is added all at once, stirred vigorously until a smooth ball of dough forms and pulls away from the sides of the pan. This step, creating what's called a *panade*, cooks the flour, essential for the choux's structure. Next, the dough is slightly cooled before eggs are incorporated one at a time. This is where patience is key: each egg must be fully absorbed before adding the next. The final dough should be smooth, glossy, and thick enough to hold its shape when piped, but still fall slowly from a spoon in a 'v' shape.
**Baking Tips for Perfect Choux:**
* **Even Piping:** Use a piping bag with a large open star or round tip to create uniform eclair shapes. Even sizes ensure even baking.
* **Steam is Key:** Choux pastry relies on steam to puff up. Some recipes suggest starting at a higher temperature, then reducing it, or even adding a small pan of water to the oven for extra steam initially.
* **No Peeking!** Resist the urge to open the oven door during the first 15-20 minutes of baking. This can cause the eclairs to collapse.
* **Bake Until Dry:** Eclairs must be thoroughly baked until golden brown and firm to the touch. If they are removed too soon, they will deflate and become soggy. A little crispness is desired! Pierce the baked choux once out of the oven to release steam and prevent sogginess.
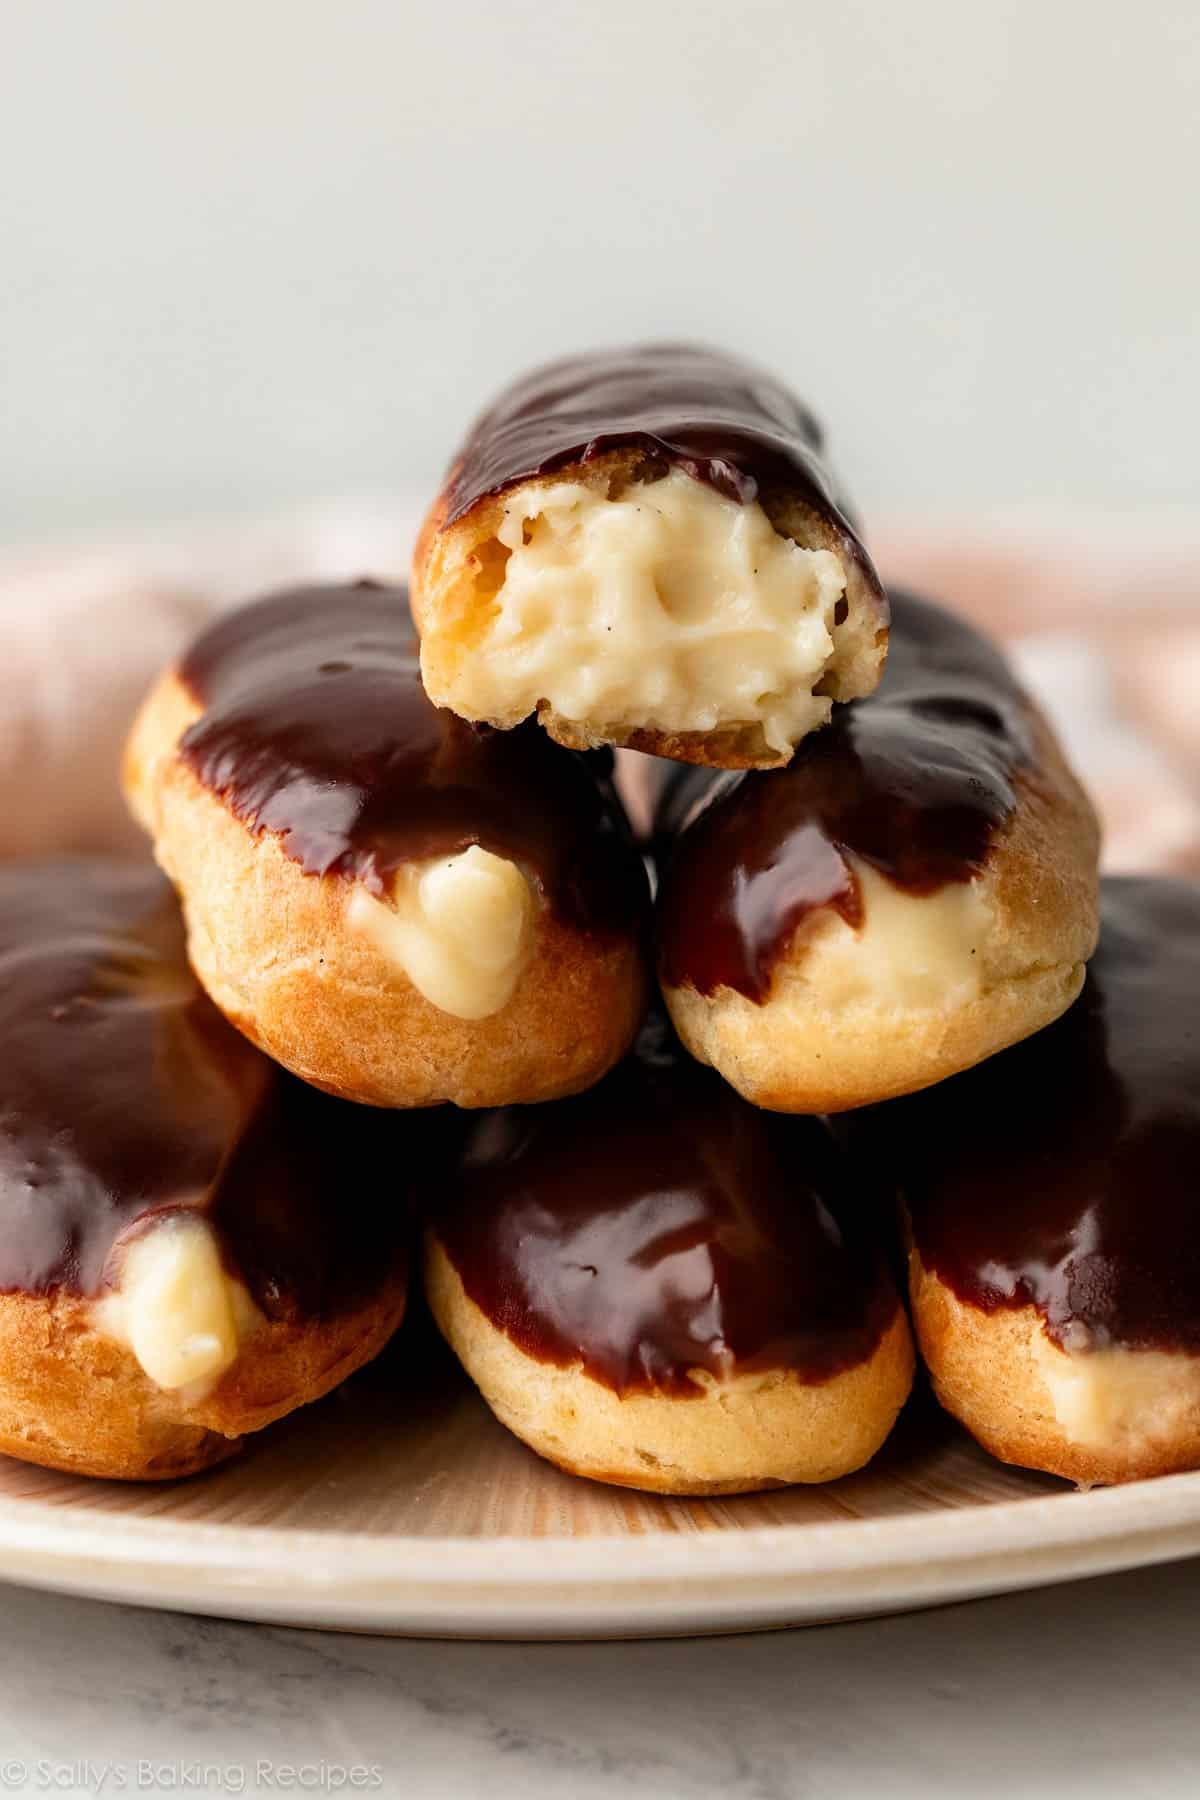
Unlocking Flavor: Simple Eclairs Three Ways with Diverse Fillings
This is where the real fun begins – customizing your eclairs! While the classic French eclair is typically filled with pastry cream and topped with chocolate, the possibilities are vast. Here are our top "three ways" to fill your homemade eclairs, plus a few extra ideas to spark your creativity:
1. **The Timeless Classic: Vanilla Pastry Cream (Crème Pâtissière)**
This rich, smooth, and utterly delicious custard is the quintessential eclair filling. Made from egg yolks, sugar, milk, and a thickening agent like cornstarch or flour, it's infused with vanilla for an aromatic finish.
* **Tip:** Pastry cream needs at least 3 hours to chill and thicken in the refrigerator, so it’s always best to prepare this element first, even the day before you plan to assemble your eclairs.
* **Flavor Boost:** Infuse the milk with a vanilla bean for unparalleled flavor, or add a splash of your favorite liqueur after chilling.
2. **Decadent Indulgence: Chocolate Pastry Cream or Ganache**
For chocolate lovers, a rich chocolate filling is a must. You can adapt the vanilla pastry cream recipe by melting chocolate into the hot milk or folding cocoa powder in. Alternatively, a thick chocolate ganache (made from chocolate and heavy cream) offers a denser, intensely chocolatey experience.
* **Tip:** Experiment with different types of chocolate – dark chocolate for an intense bittersweet flavor, milk chocolate for a sweeter, creamier profile, or even white chocolate for a delicate alternative.
3. **Light & Airy: Simple Whipped Cream**
Sometimes, simplicity is key. A light, fluffy whipped cream provides a beautiful contrast to the crisp choux pastry and rich glaze. It's also the quickest filling to prepare, making it perfect for when you're short on time.
* **Tip:** Enhance your whipped cream with a touch of vanilla extract, a spoonful of powdered sugar, or even a hint of coffee extract for an elegant mocha eclair. For extra stability, especially if serving later, consider adding a stabilizer like cornstarch or gelatin.
**Beyond the Three Ways: More Filling Ideas!**
The world of eclair fillings is truly expansive. Consider:
* **Fruit Curds:** Tangy lemon or passion fruit curd offers a zesty counterpoint.
* **Jams & Preserves:** A quick, fruity burst of flavor.
* **Diplomat Cream:** A lighter version of pastry cream, made by folding whipped cream into pastry cream.
* **Coffee Cream:** Infuse your pastry cream with espresso for a sophisticated twist.
For more inspiration and detailed methods for creating these varied and delicious fillings, we recommend checking out
Mastering Simple Eclairs: Three Delicious Ways to Create Bakery-Quality Treats.
The Perfect Finish: Glaze, Assembly, and Presentation
Once your choux pastry is baked and cooled, and your fillings are chilled, it’s time for the crowning glory: the glaze. A simple yet elegant chocolate glaze is often the choice for eclairs, providing both flavor and a beautiful shine.
**Simple Chocolate Glaze:**
A classic chocolate glaze requires only two ingredients: high-quality chocolate (baking chocolate or chocolate chips work well) and heavy cream. Gently heat the heavy cream, then pour it over the chopped chocolate or chips. Let it sit for a few minutes, then whisk until smooth and glossy. For a truly professional finish, ensure your glaze isn't too hot when dipping, or it will melt your filling. It should be warm enough to be fluid but cool enough to set.
**Assembly Tips:**
1. **Filling the Choux:** Once your choux buns are completely cool, they are ready to be filled. You can either slice them horizontally with a serrated knife and spoon or pipe in the filling, or, for a cleaner look, poke three small holes in the bottom of each eclair using a piping tip and pipe the filling in until plump.
2. **Glazing:** Dip the tops of the filled eclairs into the warm glaze. Allow any excess to drip off before placing them on a wire rack to set.
3. **Presentation:** A sprinkle of chopped nuts, a dusting of cocoa powder, or a drizzle of contrasting chocolate can elevate the visual appeal of your homemade eclairs.
Beyond Baking Day: Smart Storage & Freezing Solutions
One of the challenges with eclairs is maintaining the crispness of the choux pastry, especially once filled. The moisture from the filling can quickly soften the delicate shell.
* **Short-Term Storage:** Filled eclairs are best enjoyed within 1-2 days. Store them in an airtight container in the refrigerator to prevent them from drying out or absorbing fridge odors. While they might lose a little of their initial crispness, they will still be delicious.
* **Freezing Filled Eclairs:** If you’ve made a large batch and want to save some for later, filled eclairs can be frozen. Lay them in a single layer on a baking sheet and freeze until solid. Once frozen, transfer them to a freezer-safe bag or container, separating layers with parchment paper. They can be stored for 1-2 months. Thaw at room temperature for about an hour before serving.
* **Freezing Empty Choux Buns:** This is truly the secret weapon for future eclair cravings! Empty, baked choux buns freeze exceptionally well for up to three months. Freeze them in a single layer on a tray, then transfer them to a freezer-safe bag. To use, thaw them in the refrigerator, then re-crisp in a preheated oven at 300°F (150°C) for 5-10 minutes. This step is crucial for bringing back their perfect texture before filling and glazing.
For an even deeper dive into preserving the quality of your homemade pastries and making the most of your baking efforts, explore
Unlock Eclair Success: Essential Tips for Crisp Pastry & Freezer-Friendly Options.
Your Eclair Success Toolkit: Tips & Troubleshooting
Don't be discouraged if your first batch isn't picture-perfect. Baking, especially with choux, is an art that improves with practice. Here are some common issues and quick tips:
* **Soggy Bottoms:** This usually means the choux wasn't baked long enough or pierced to release steam. Ensure a long, slow bake until completely dry and firm.
* **Collapsed Eclairs:** Often a result of opening the oven door too early or not baking long enough. The internal structure needs time to set.
* **Pastry Not Puffing:** Could be under-mixing the eggs (not enough aeration) or the panade wasn't cooked enough, preventing proper steam expansion.
* **Too Runny Pastry Cream:** Likely needs more chilling time or slightly more cornstarch/flour in the recipe.
Remember, the goal is to enjoy the process and the delicious results. With these tips and a little patience, you'll be creating bakery-quality
simple eclairs three ways (or more!) right in your home kitchen.
Crafting homemade eclairs might seem like a grand undertaking, but it’s an incredibly gratifying baking adventure. By understanding the fundamentals of choux pastry, experimenting with our "three ways" to fill them, and mastering the art of glazing, you’ll unlock a world of delicious possibilities. So, gather your ingredients, clear your schedule, and embark on your journey to creating perfect, personalized eclairs that will undoubtedly impress anyone lucky enough to try them. Happy baking!